 "StudyStudyStudy" (jesterjin)
12/11/2015 at 15:10 • Filed to: None
 7
7
 15
15|
"StudyStudyStudy" (jesterjin)
12/11/2015 at 15:10 • Filed to: None | 7
| 15 |
So it has been a while.
Life has been moving along, and the weather has been getting a lot wetter and colder.
I decided as I am redoing my rear control arms I might as well replace the whole kit and caboodle as they say.
The rear control arms were coming along fine.
I welded up the arms by tacking everything in place.
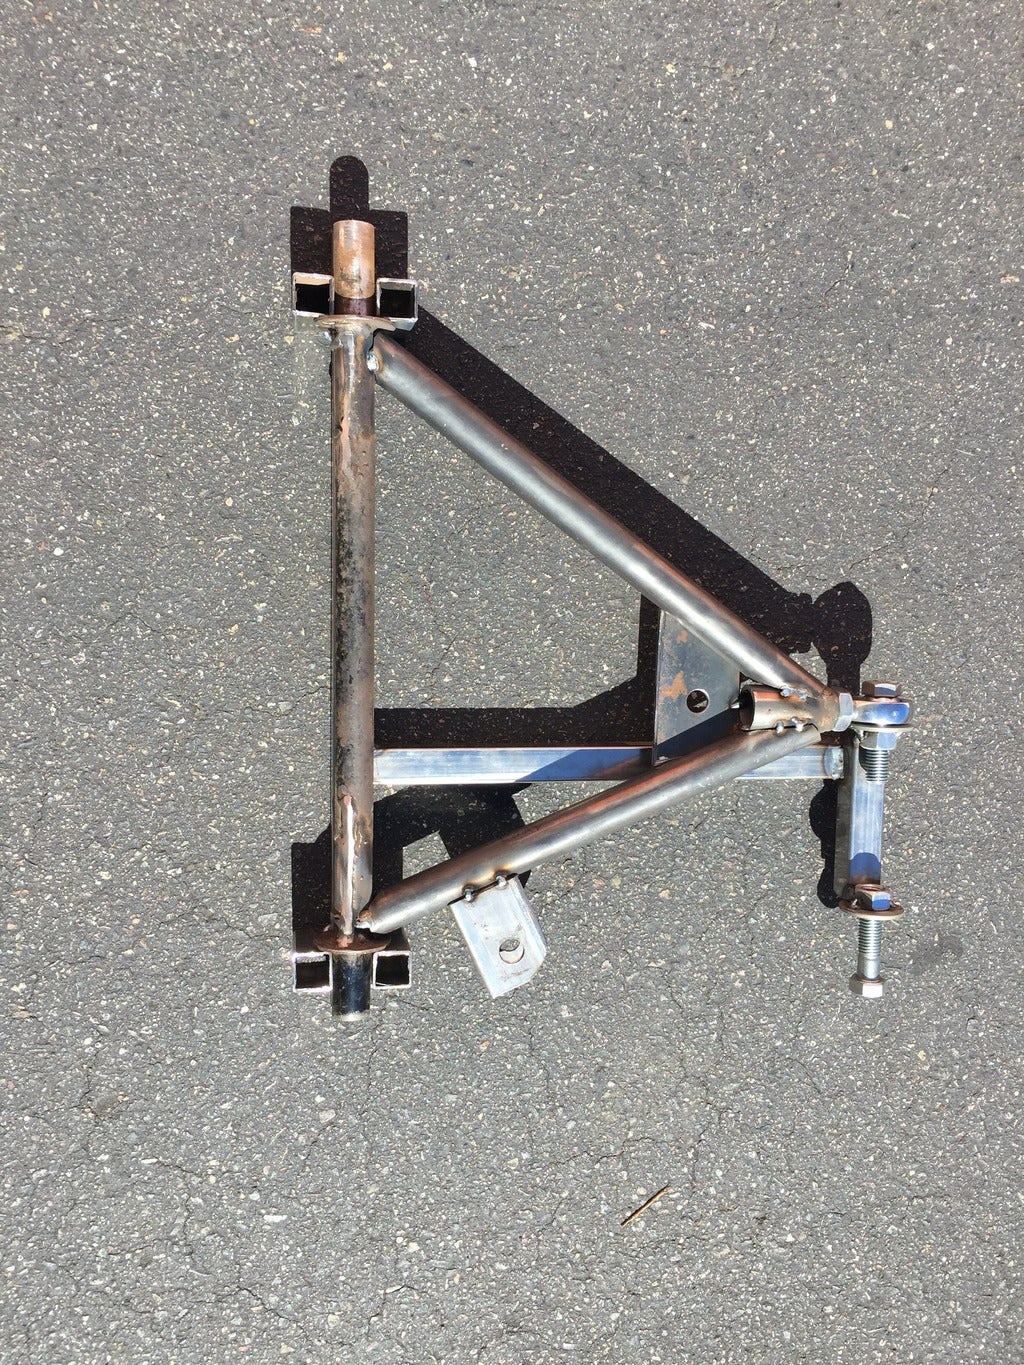
Then once I was happy finished the welds.
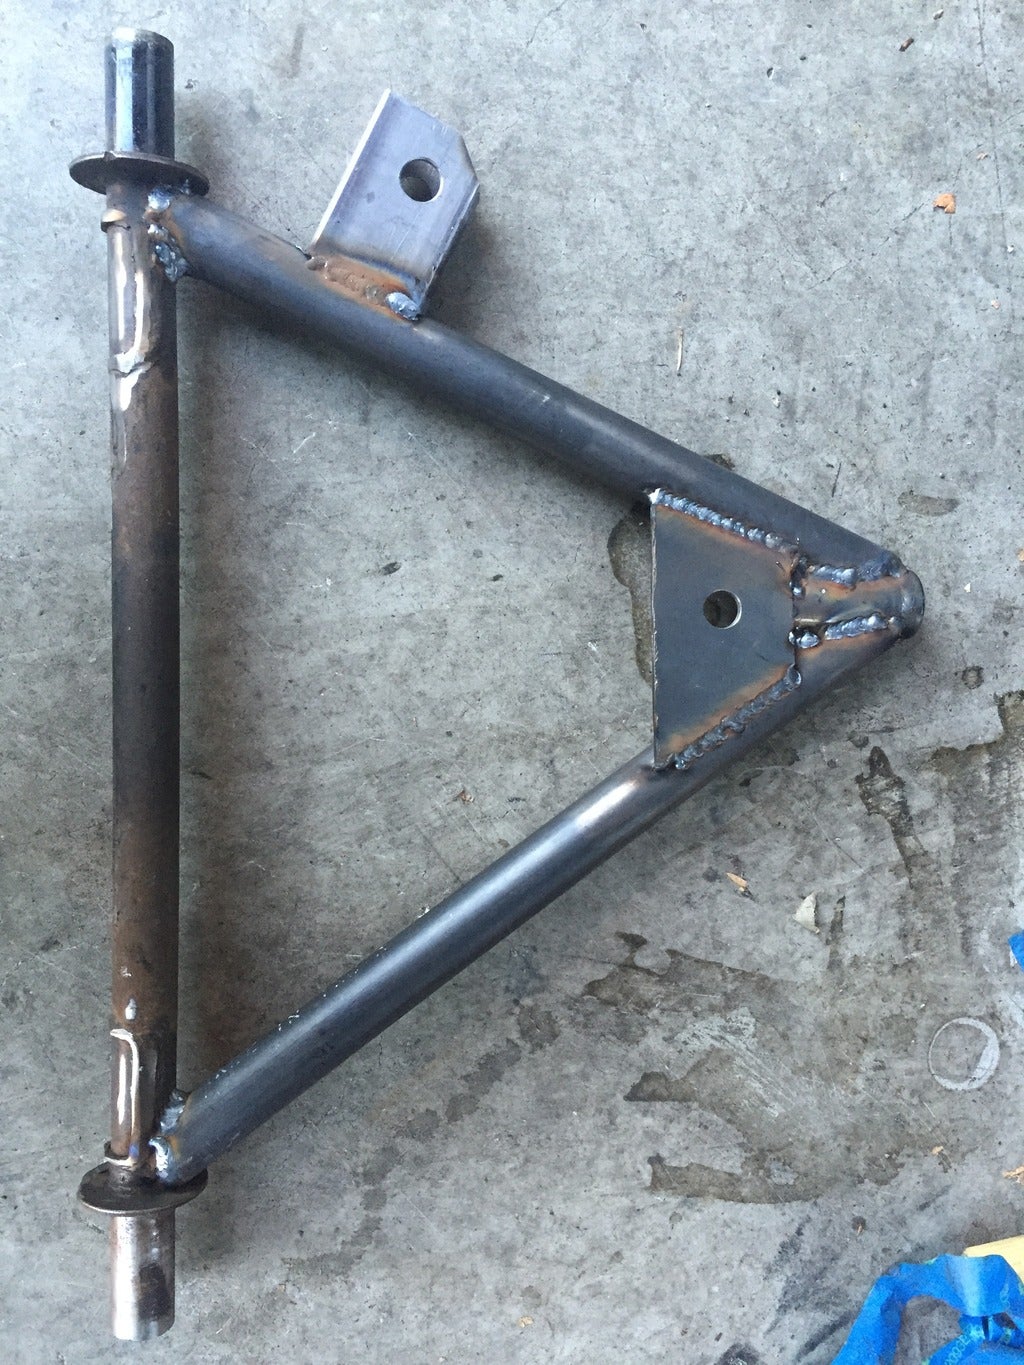
Had to redo the toe link bracket as it pulled the tack welds off as I started putting heat into the other side.
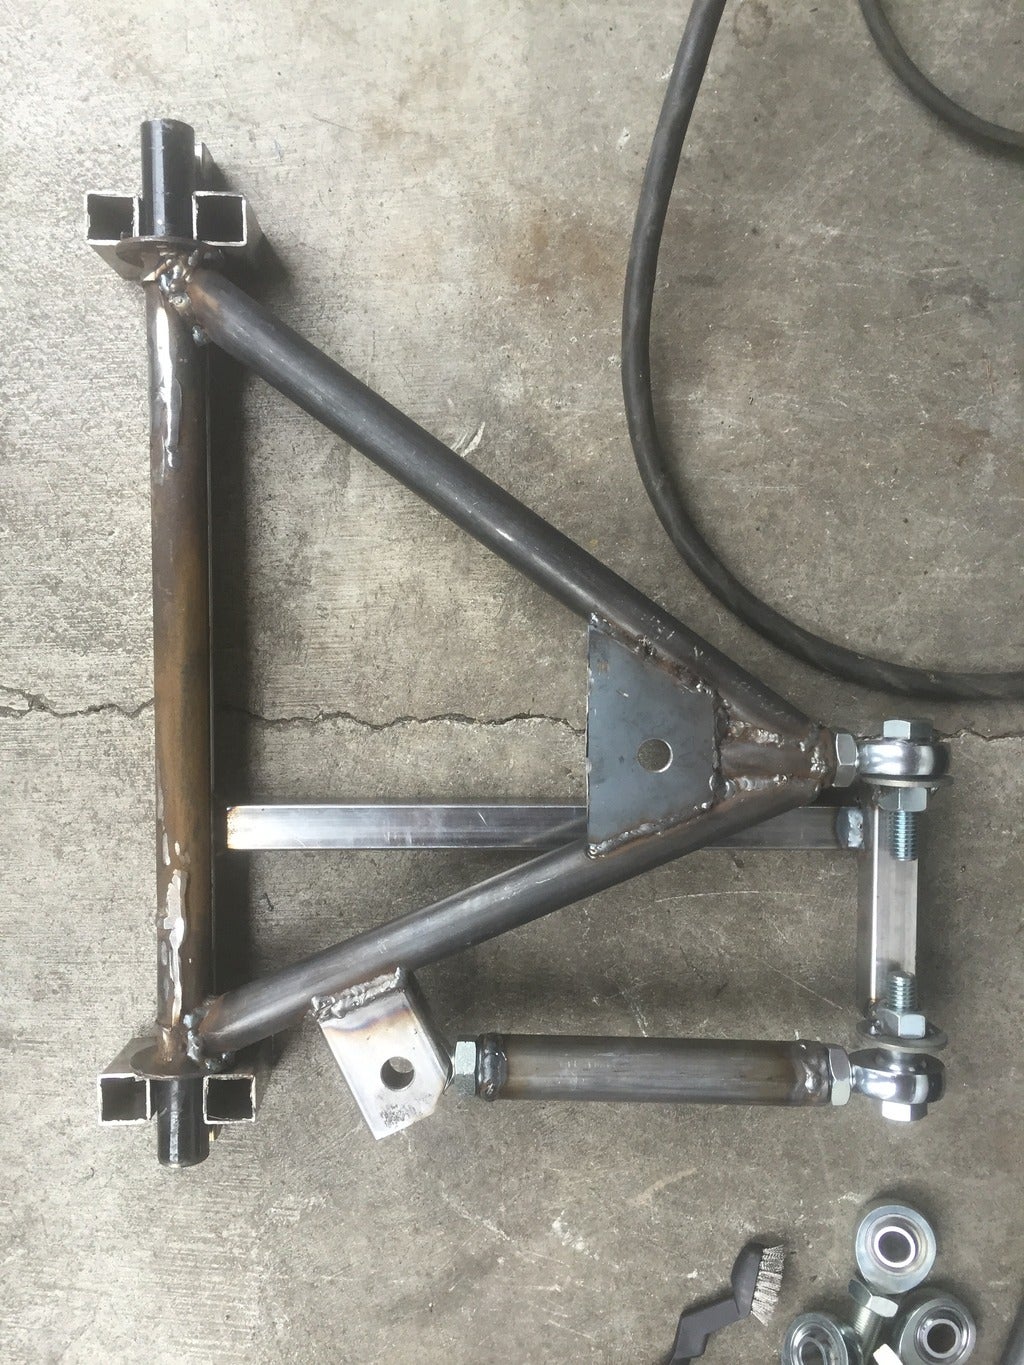
After finishing I reassembled it with the toe link arm to get a good look at it.
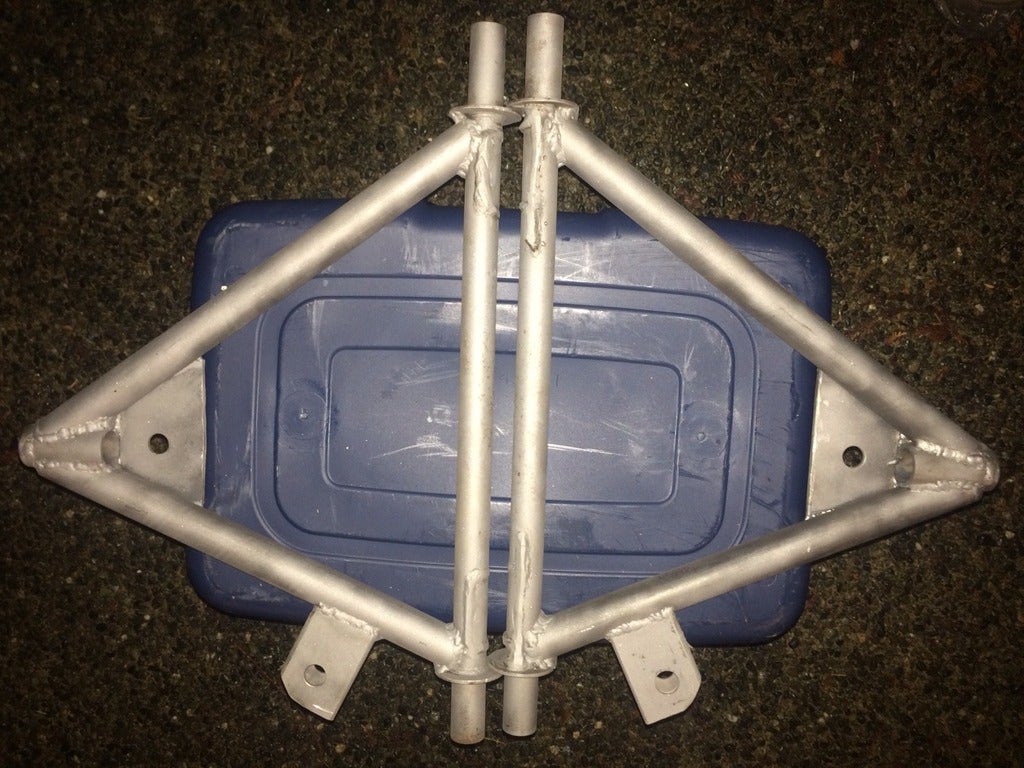
Then I found a local sand blaster to give it a once over prior to powder coat.
I figured the toe link would need somewhere for a wrench to grab onto to make it adjustable on car, so I threw on a piece of square tubing to give it flats.
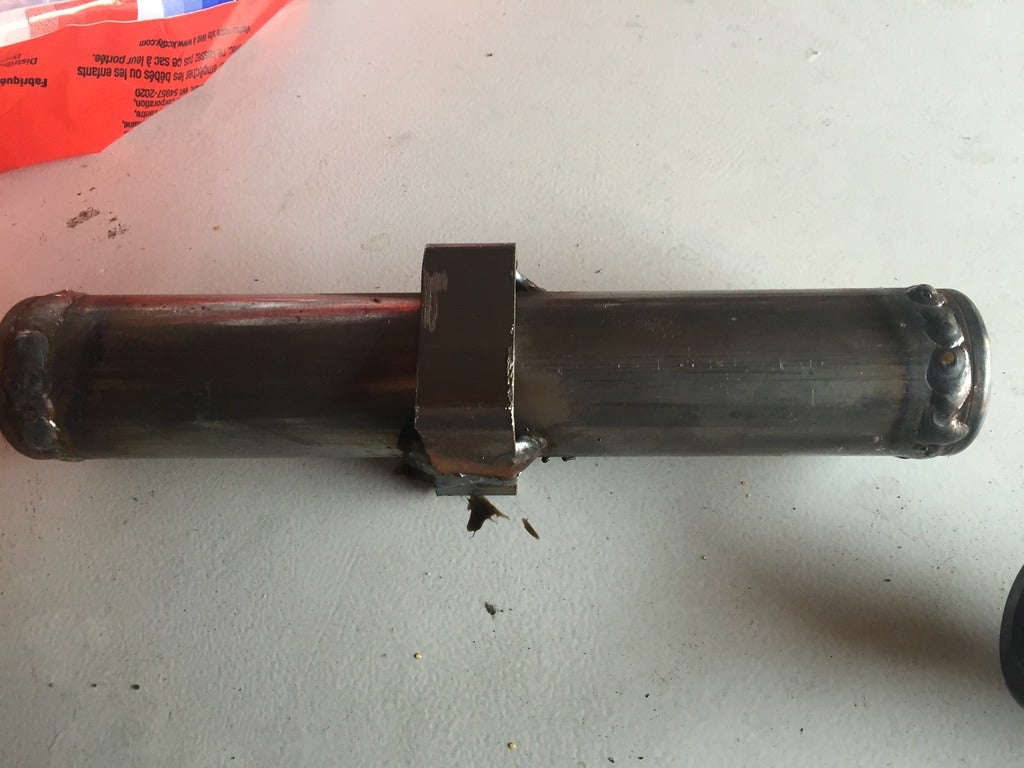
Just need to finish grinding some of the welds down on the original control arm and then I can drop it off at the powder coater.
With the rear taken care of I turned my attention to the front. I had a plan for the front lower control arm, but the adjustment would be moot without an adjustable tension rod. Techno toy tuning had a new setup for sale that seemed promising, but some individuals on my forum had found some points of contention in the design. Turns out that they either found the same or decided to listen and I happily picked up their GTX2 control arm tension arm combo for a gift to myself from myself.
I had been slow about getting progress done, but after I decided I was going to blast the rear arms, I decided it would be silly not have him blast the front strut housings to boot. So I lopped off the top portion and gathered up all the parts and handed them to him. He worked crazy fast. Had pictures in 10-15 minutes of the parts as he was blasting them.
After about an two hours he had all my parts done.

Now I just need the rain to stop so I can re-organize my work space and weld the coilovers onto the spindles.
Along with my differential I had decided I wanted to swap to more angle friendly CV shafts. The original plan was to run the stock half shafts, but I figured in an overhaul of this nature I might as well have an entire rear end setup I could just swap in. The driver side would take a variety of axle inputs that Nissan/datsun had used, but the passenger side would need the longer shaft to engage the viscous portion of the VLSD.
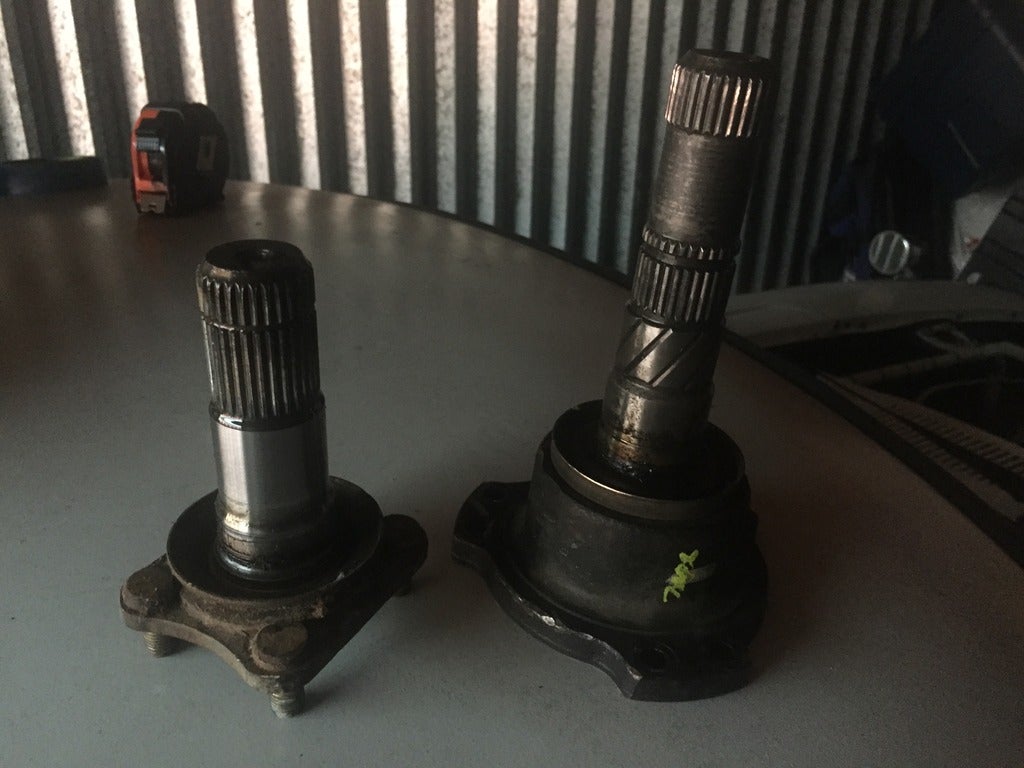
A local post came up selling adapters for the 280z stub axle into the 3x2 pattern the 280zx turbo used. At that price it was hard to pass up a solution for the driver side. That left me with having to figure out how to go from an infiniti J30 input on the passenger side to a 280zx tripod.
A promising source had details, but all the pictures had lost the link, so I was beginning to go into the more hair brained areas of welding axles and such. Luckily the site came back online better then before. Xenonzcar.com. It outlined the swap pretty much verbatim for getting this setup in an NA Z31. Unfortunately the S30 chassis is a bit narrower then the Z31 and so I could only glean some information. I did find out that the 280zx turbo and the Z31 NA do share the same stub/hub flange pattern. So that meant ordering another axle would get me one step closer. I found that the Z31 also shared the same spline count and diameter as the infiniti and found that nissan did this form any vehicles. A little more googling and I found that a shorter axle with the same spline could be found on a Nissan path finder and it would have the same pattern as the infiniti.
Additionally I found a website that sold complete CV joint kits, so I ordered one for a G35 (supposedly a very similar 3x2 pattern to the 280zx turbo) and a replacement one for the infiniti.
So with all these pieces in hand it was time to determines how much room I had to work with.
I decided to get a base starting point with how my car was sitting, the arms nearly parallel which to me said that it was compressed the most. Upon measurement is where someone pointed out my mistake.
I posted my length which was quite a bit longer then anyone else had reported. In addition I commented on the rake my axles had. This prompted someone to state that the R200 fixed the rake in the axles and that they were supposed to be perpendicular.
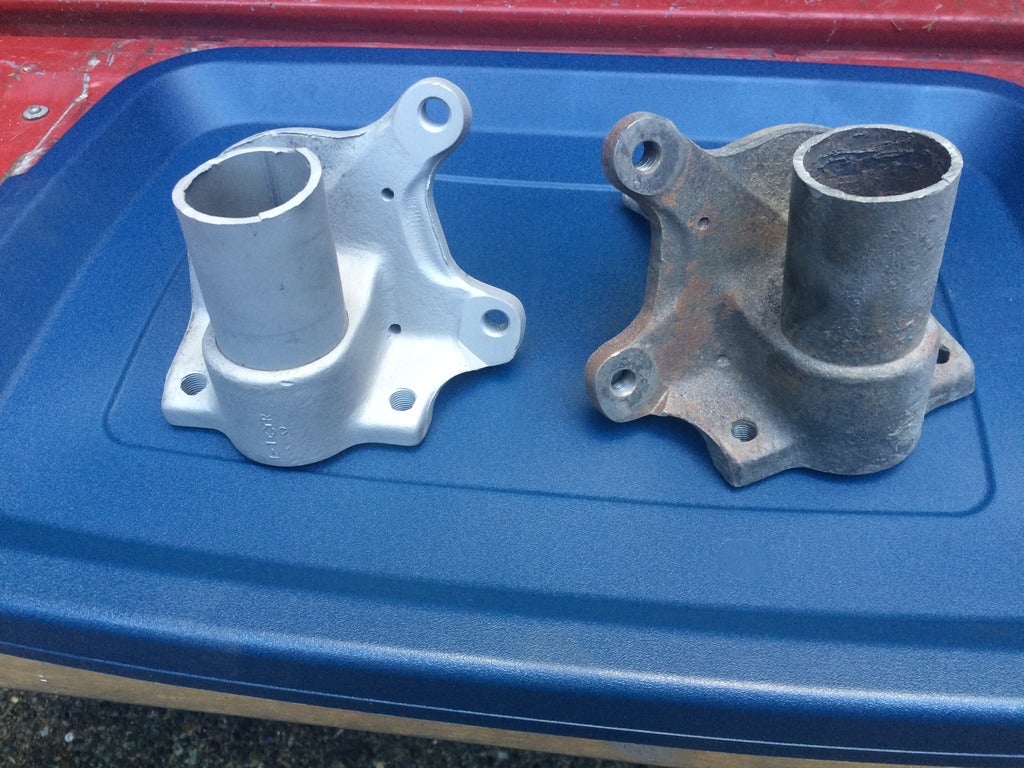
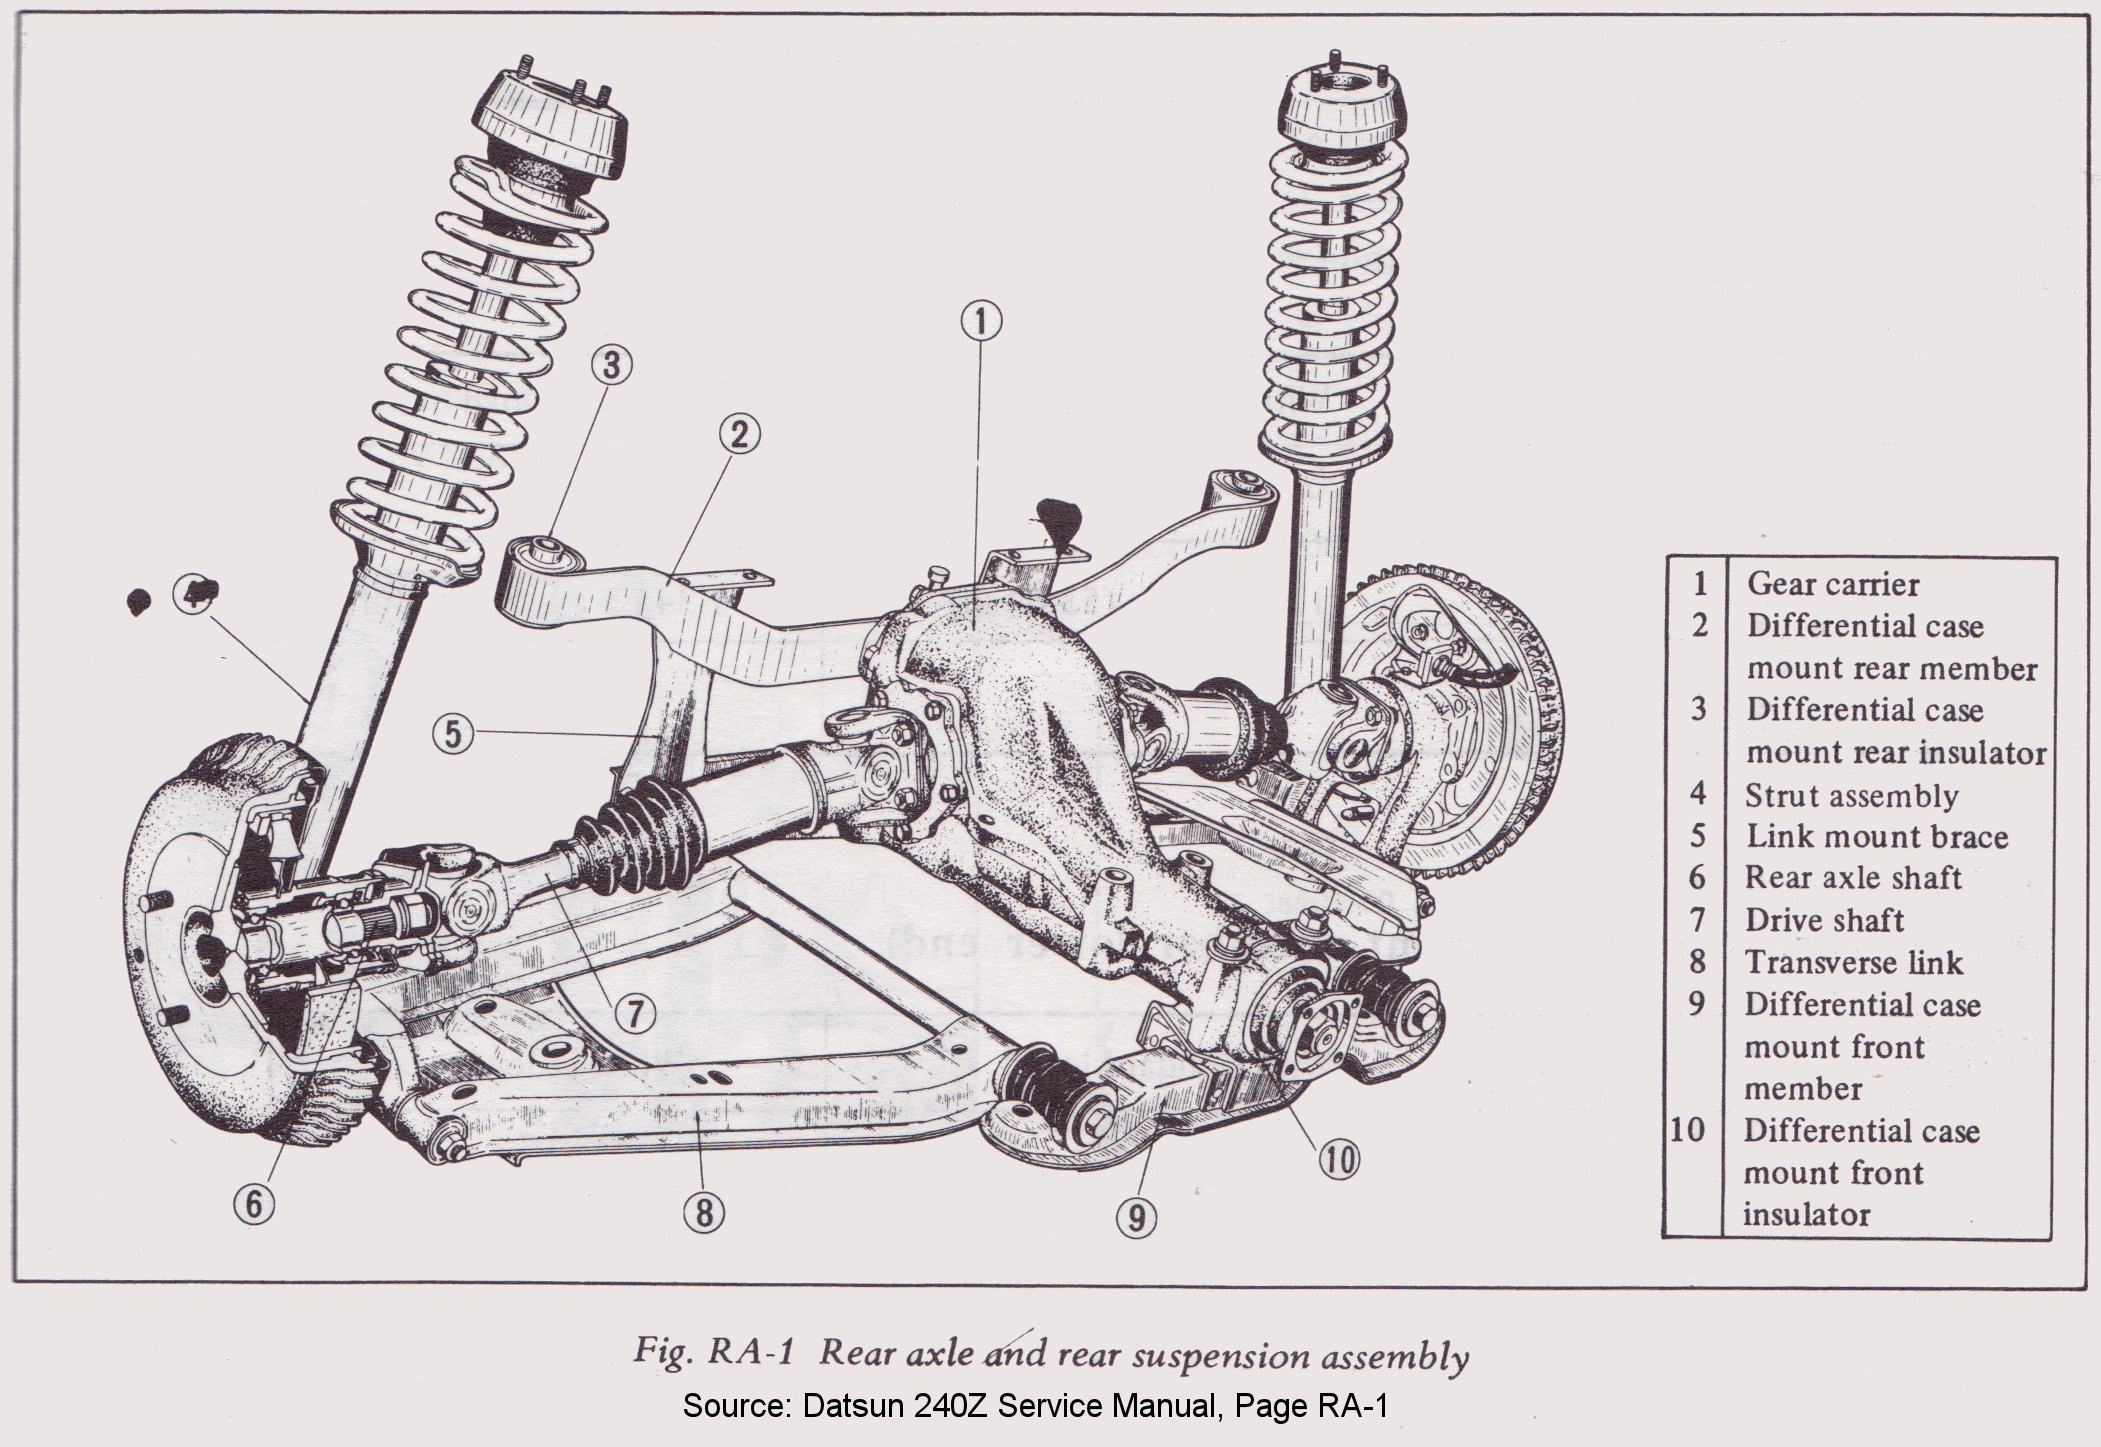
(R180, notice number 3, and its orientation)
R200 on right and R180 on left
Fuuuuuuu.
I had installed an R200 long nose in my car. When I installed the differential in the car to replace the smaller R180, I used the R180 manual and installed the differential. Turns out to make room for the larger ring gear, the engineers decided to just flip the mount 180 to make additional room. That meant that not only was my axle length artificially long, it also meant that the custom drive shaft I had build would now be too short with the correction.
Well good news is that with the news that my numbers were off meant that I could fall back onto reported numbers.
My frankenstein axle (WD21 housing - WD21 tripod - WD 21 axle - Febest G35 tripod - 280zx turbo housing) mocked up would be about 13.5 inches long. The minimum distance I calculated put my axle’s minimum length at 13.65 inches long. That meant I could in fact use this axle without any modification, and if needed I could increase my track width with my control arms if it bound up or bottomed out for any reason.
So the plan is to build the axle and reassemble it.
Weld on the coilovers
Reassemble the differential
Costs:
2 x 280zx turbo axles - 120
1995 nissan pathfinder axle - 40
Febest g35 cv joint kit -60
Febest pathfinder cv joint kit -50
Sandblastin - 120
Extra steel -10
Shims for VLSD - 40
280zx turbo adapters -340
Subtotal - 780
Total Spent -20450
 bob and john
> StudyStudyStudy
bob and john
> StudyStudyStudy
12/11/2015 at 15:15 |
|
errm. please tell me that total has an accidental 0 in it
 functionoverfashion
> bob and john
functionoverfashion
> bob and john
12/11/2015 at 15:22 |
|
Read back through the other posts; part 23 the total was $19,670
 RamblinRover Luxury-Yacht
> bob and john
RamblinRover Luxury-Yacht
> bob and john
12/11/2015 at 15:24 |
|
This is part 25. Because our compatriot has gone somewhat nutzo and this has been continuing for a long time, the subtotal he lists is actually about 1/25th of the amount spent thus far, which is what you’d expect if you expect consistency. Little things, a little bit at a time, and sooner than you know, out $20k on a very highly customized insanity car.
 MonkeePuzzle
> StudyStudyStudy
MonkeePuzzle
> StudyStudyStudy
12/11/2015 at 15:33 |
|
I love reading these! again, nice work, keep it up!
|
StudyStudyStudy
> bob and john
12/11/2015 at 15:40 |
|
Unfortunately it does not :(. The value however is for the entire car/project so far, and that has been over a span of I think 4 years now.
|
bob and john
> StudyStudyStudy
12/11/2015 at 15:41 |
|
JFC man.
|
StudyStudyStudy
> MonkeePuzzle
12/11/2015 at 15:45 |
|
Thanks, it is nice to organize my thoughts, glad someone is enjoying it :).
|
StudyStudyStudy
> bob and john
12/11/2015 at 15:54 |
|
Yea, seeing an actual number is kind of daunting to be honest. Kind of the whole point for me, owning and modifying a $500 car is not necessarily as cheap as some people make it sound. I guess it depends on how much you know, for me this was my dive into the deep-end, no knowledge, learning as I go.
If you really want to be blown away you should see Jared’s build. A money no object build that had some really expert people working on it. My car doesn’t compare in any way, but these builds really can go crazy.
http://www.superstreetonline.com/features/modp-…
Last number I heard was that he was near 100k into it.
|
MonkeePuzzle
> StudyStudyStudy
12/11/2015 at 15:59 |
|
build logs are probably my favourite reading
|
StudyStudyStudy
> MonkeePuzzle
12/11/2015 at 16:03 |
|
Same, or build shows.
I wish I had more time to throw at this, I kind of miss having my mountain of photos and work that I had already done.
Still have an entire shelf of goodies that I have been buying to throw on. Some really pretty things and projects lined up to make it much nicer as well.
 BringBackTheCommodore
> StudyStudyStudy
BringBackTheCommodore
> StudyStudyStudy
12/11/2015 at 16:40 |
|
For some reason, I read that as ‘$500 “car part”’ rather than “$500 car.”
Great writeup!
|
StudyStudyStudy
> BringBackTheCommodore
12/11/2015 at 17:40 |
|
I’ll have to throw a comma in there from now on, thanks!
 Dr. Zoidberg - RIP Oppo
> StudyStudyStudy
Dr. Zoidberg - RIP Oppo
> StudyStudyStudy
12/11/2015 at 19:27 |
|
Total Spent -20450
I’m feeling much better about the money I sunk into one of my previous vehicles. Though I am jealous of of you skillz and hobbies. $5k a year? That’s not so bad. I know people who probably spend that much on coffee.
|
StudyStudyStudy
> Dr. Zoidberg - RIP Oppo
12/11/2015 at 20:08 |
|
Actually just checked, 5 years now going on 6.
True that isn’t that bad, roughly 4k a year, but man that is a miata each year too if I think about it that way.
|
BringBackTheCommodore
> StudyStudyStudy
12/12/2015 at 09:37 |
|
No worries, I really enjoyed the writeup. I was just insanely curious what the $500 car part was, LOL!